June 15, 2012

Solar Splash Competition 2012


After taking a detour in Cincinnati to pick up a CMSS team member, we made it to Cedar Falls, Iowa in a rental vehicle late Monday night, ready to start the competition the following morning.

On Tuesday we finished modifying the propulsion system to hold the electric motors the further above the water and also added pontoons to increase stability.  

The modification to the propulsion system limited us to attaching one Etek motor, which will be used in both the endurance and sprint events.  The pontoons allow the boat to safety operate in windy conditions at the lake where the 2012 Solar Splash competition is being held (in Cedar Falls, Iowa) while also adding a minimal amount of drag.

On Wednesday, the team passed the electrical and mechanical inspections and competed in the maneuverability qualifying event.  Driven by Nate, the boat completed a test demonstrating the basic maneuverability of the boat.


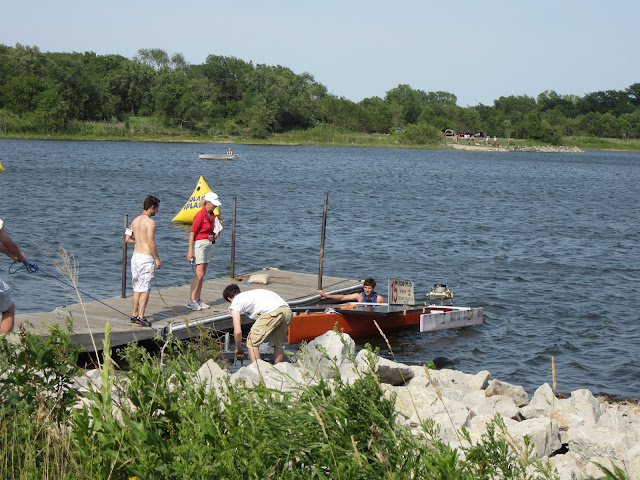
Testing at the lake before the competition.

Nate is pulling the boat over to the launch area.

Launching the boat into the water.


 Jon is holding the boat in place despite the wind while it is being inspected.


Nate is in the boat ready to do the maneuverability test.


May 6, 2012

If it looks like a boat...

The boat is finally starting to look like a boat. Gunwales and bulkheads are installed. The only problem is that it's not 100% waterproof.


To solve this, we added another coat of Gluvit epoxy-based undercoater/sealer. This time we added white pigment so we can't paint right over it. We're thinking orange.


March 24, 2012

Boat Building 101

Hull construction is now fully underway and things are looking up. At the end of the layup process, we had our fair share of concerns. While the fiberglass went on exceptionally smooth (thanks to the efforts of Nate and Zach), the vacuum bag didn't exactly function according to plan: as in there was no vacuum. The result was a surface that intermittently smooth and gridded. Still, it matched the hull form nearly perfectly, with far fewer bubbles than the last time we did this.

And thus began the long and arduous process of removing the foam from the boat. Each member had their own preferred method, mostly involving chisels, hammers, wedges, drills, and jigsaws...or some combination thereof.
By the end of day 1, less than half of the foam had been removed. We payed special attention to leaving several foam cross-sections in the hull so they can act as bulk-heads.
After everyone left for the night, Robbie and I decided to do a simple waterproofing test: pour a bucket of water into the hull and see if any leaks out.
Unfortunately, it did. You can see the droplets forming on the outside of the hull, meaning that water is passing through the hull.
During our Saturday session, the rest of the foam was removed (with the exception of flooring support). It actually looks like a boat now! Most importantly, it's shaping up to be our best boat yet!

January 20, 2012

Making the Mold

Back from break, we are continuing work on manufacturing the boat hull.  We are gluing together the foam pieces of the plug and will soon be coating and finishing the plug.

Sanding and scoring the foam pieces

Gluing individual pieces of foam

Glued Foam Plug

 Sanding the Plug

Foam Plug from the Front